RMClient integrates with:
● Jira
● Jira Cloud
● Redmine
● Easy Redmine
● Planio
What is RMClient Product?
RMClient helps to shepherd projects from start to completion. When starting a task, the user clicks the start button next to it, and the program counts the working hours. If it notices that the user is inactive, the time tracking stops.
When the user turns on the clock on a new task, the time on the previous one automatically stops.
What Benefits Does RMClient Give to Project Managers?
Time tracking
The project managers’ software for time tracking counts working hours and can send periodic notifications to monitor user activity. Write notes about what you've been working on at different periods.
Cost optimization
You will know your and your team’s accurate working hours. Calculate the billable time you spend on different projects and set fair KPIs for your employees. Grow the revenue and profitability of your team.
Control project deadlines
Thanks to project managers’ time tracking tool, you will be able to accurately build project strategy, estimate deadlines, and offer realistic time frames that will be comfortable for your team.
Project management
Easily add new tasks without opening the web version of Jira or Redmine. All typical task management features are available to you: setting up an assignee, a deadline, etc. Search for, sort, and filter tasks.
Time saving
Set deadlines for tasks and get notified when they expire. Solution for project managers’ time tracking will help you to work productively, not exceed the standard working hours, or track overtime as accurately as possible.
Communication with colleagues
Messages you send to your colleagues will appear on top of all other windows on a dashboard. If necessary, set up a message confirmation.
RMClient's Time Tracking Features for Project Managers
Planning time for each task
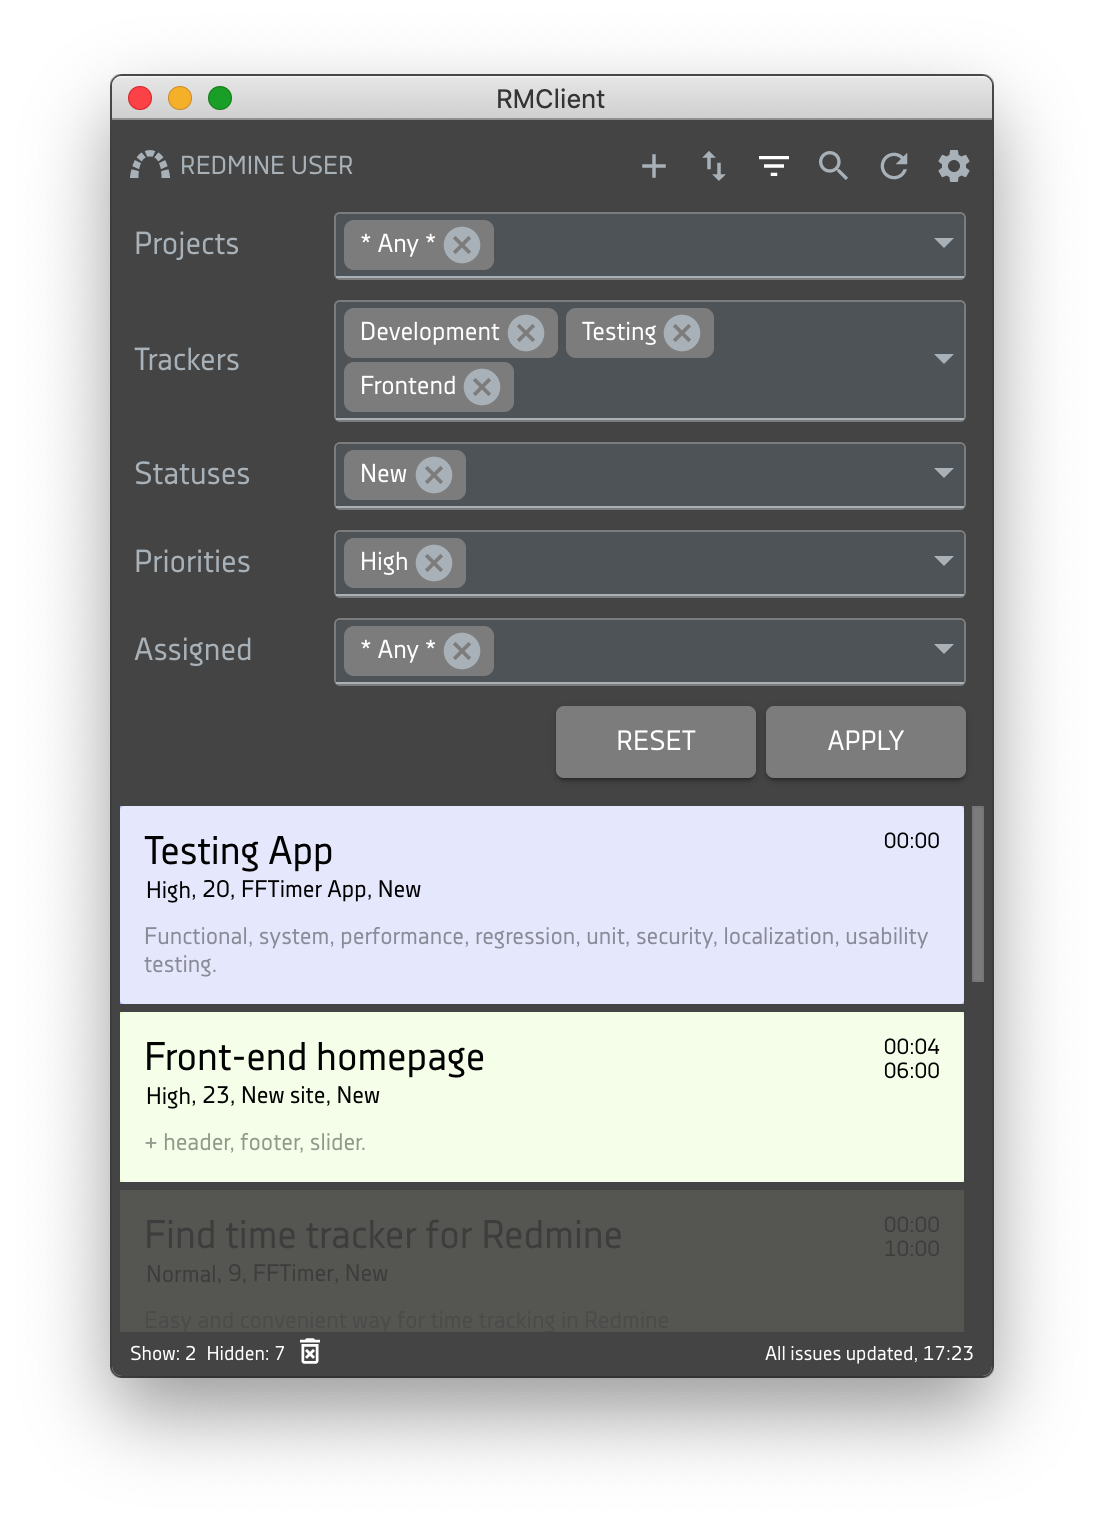
Each task has two time stamps. The upper one is the time spent on this task. The lower one, in parentheses, is the time allotted for it.

Filter and sort tasks
Click the funnel icon to find the tasks you need. Filter them by the following parameters:- Project. Specify which of the working projects in Jira or Redmine the task belongs to.
- Tracker. Select the desired option: Planning, Development, Design, Management.
- Status. Specify which tasks to display: all, new, in progress, solved, feedback, closed, rejected.
- Priority. Set it to high, normal, or low.
- Version. Specify the version of the task.
- Assignee. Select the user who performed the task you are looking for.
Create a new task or edit an existing one
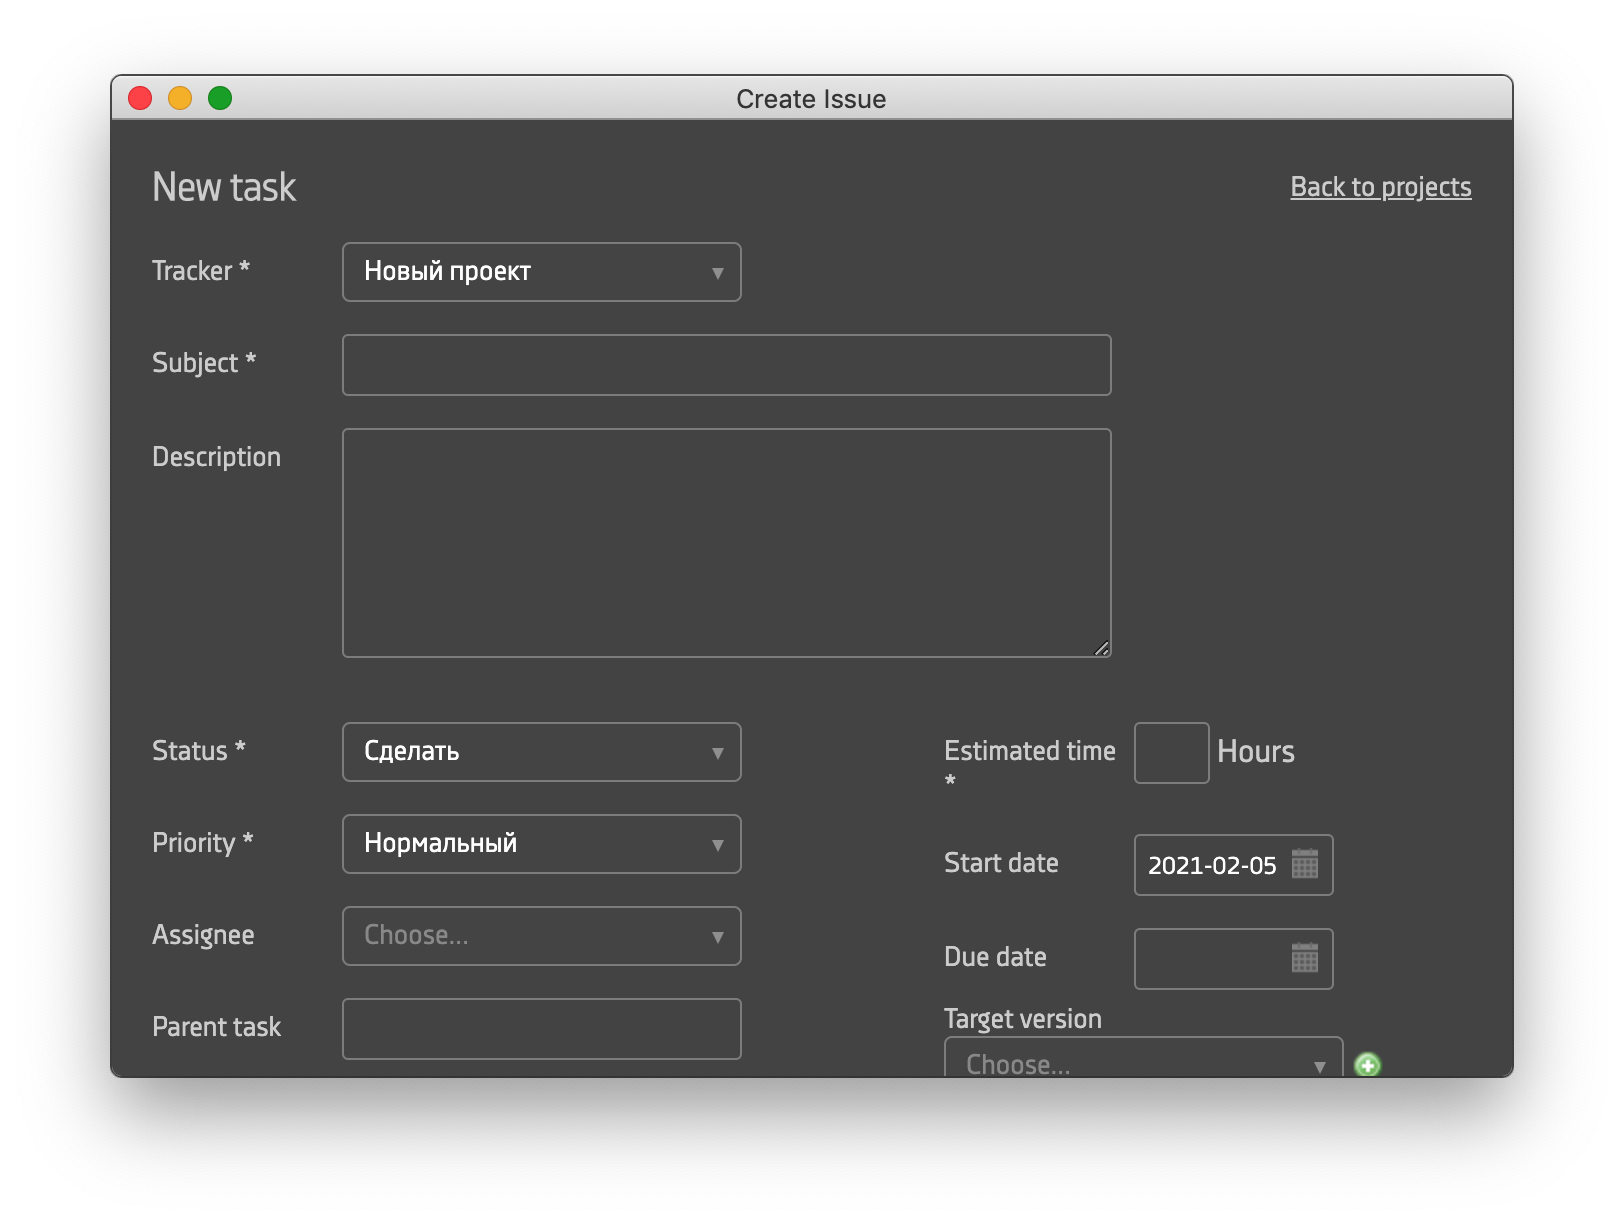
Use the tools to create a task directly from the app window outside the web version of Jira or Redmine.By default, you need to specify the project to which the task belongs, give it a name, and set the priority. Be sure to specify the status of the task (new, in progress, solved, feedback, closed, rejected). This will help you with navigation and search later.

Assign task performers
Specify which of your employees is in charge of the assignment. Use the name search or scroll through the drop-down list.
Attach files
The task creation and editing forms contain a field for notes and attaching any type of file. You don't need to go to the web version of Jira or Redmine to attach it.
Set a deadline
Set a start date and due date for the task, and add an estimated time. This will help you track your progress, complete work on time, and reach your project goals.
Use reminders
In the settings section, enable useful features. A reminder to comment on the time spent will periodically send you pop-up notifications.
Track only actual time spent
The Stop Tracking in Sleep mode feature in the app will help you pause tracking while you are not working on a task. The clock is also off when the program notices a long period of inactivity. This will help you get the most accurate data possible.
Try the Web Demo
- Planning
- Development
- Design
- Managment
- New
- In progress
- Solved
- Feedback
- Closed
- Rejected
- Low
- Normal
- High
- Urgent
- Immediate
- Dean Cundey
- Harry Keramidas
- Alan Silvestri
- *Any*
- *Any*
- Planning
- Development
- Design
- Managment
- New
- In progress
- Solved
- Feedback
- Closed
- Rejected
- Low
- Normal
- High
- Urgent
- Immediate
- Dean Cundey
- Harry Keramidas
- Alan Silvestri
- *Any*
- *Any*
- Planning
- Development
- Design
- Managment
- New
- In progress
- Solved
- Feedback
- Closed
- Rejected
- Low
- Normal
- High
- Urgent
- Immediate
- Dean Cundey
- Harry Keramidas
- Alan Silvestri
- *Any*
- *Any*
- Planning
- Development
- Design
- Managment
- New
- In progress
- Solved
- Feedback
- Closed
- Rejected
- Low
- Normal
- High
- Urgent
- Immediate
- Dean Cundey
- Harry Keramidas
- Alan Silvestri
- *Any*
- *Any*
- Planning
- Development
- Design
- Managment
- New
- In progress
- Solved
- Feedback
- Closed
- Rejected
- Low
- Normal
- High
- Urgent
- Immediate
- Dean Cundey
- Harry Keramidas
- Alan Silvestri
- *Any*
- *Any*
Add this time to task?
Steps to Start Using
Step 1. Download the RMClient installation file.
Step 2. Run the installation file (RMClient.exe) and click the Install button.
Step 3. Confirm the installation and select the settings that suit you: automatic or your own.
Step 4. Wait for the application to start automatically after the installation is complete.
Pricing
Free trial version for 30 days
- 1 month
- 3 month
- 6 month
- 12 month
Recommended for personal use and small teams

$5
- One license key per one user
- Choose a suitable period
- Discounts depend on the period and the number of license keys
* Please note, license keys cannot be shared. The number of license keys should be equal to the number of unique users.
Ideal for large development teams of 12 people and more

$500
- Unlimited number of users
- Money-saving annual subscription
- Single Company License Key
Our Clients
These companies already track time with RMClient


